Disclaimer: Sorry about the quality of the pictures. I usually like them looking clearer but was in a hurry before it got too cold for me to run out to the greenhouse! Yes, I am a wuss!
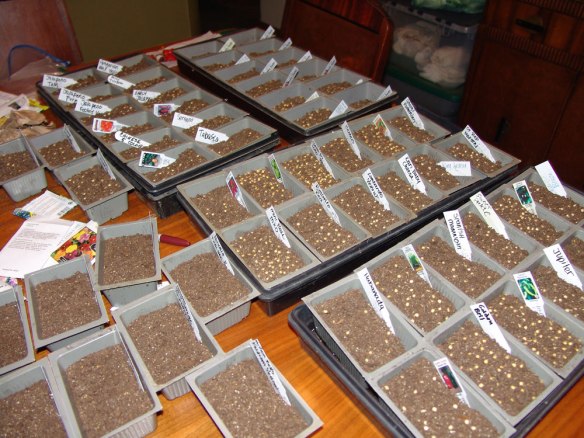
Over the last three days, I have been transplanting peppers. Sweet bell peppers, sweet non-bells, Italian frying peppers, heirlooms, super hot peppers, medium hot and just plain hot peppers, All types, all colors. Right now it is about 20 degrees outside, There is still snow on the ground. In the greenhouse it is a balmy 60 degrees due to the sun being out and shining on me and my babies. I also transplanted some schizanthus, cinnamon basil, million bells, alyssum and petunias.
I had a hard time getting into my groove as The Tomato Lady. Not sure why but as soon as I got my hands into the potting soil, I started getting into the swing of it. Nothing says spring like green plants. The knowledge that each one of those itty bitty plants was going to become a large plant giving us good things to eat in the summer just amazes me!
SCHIZANTHUS Baby and in full bloom
And the flowers are even better to work with. Those are truly tiny and they will be gracing mine and your yards at a future date flooding the landscape with color and scents.
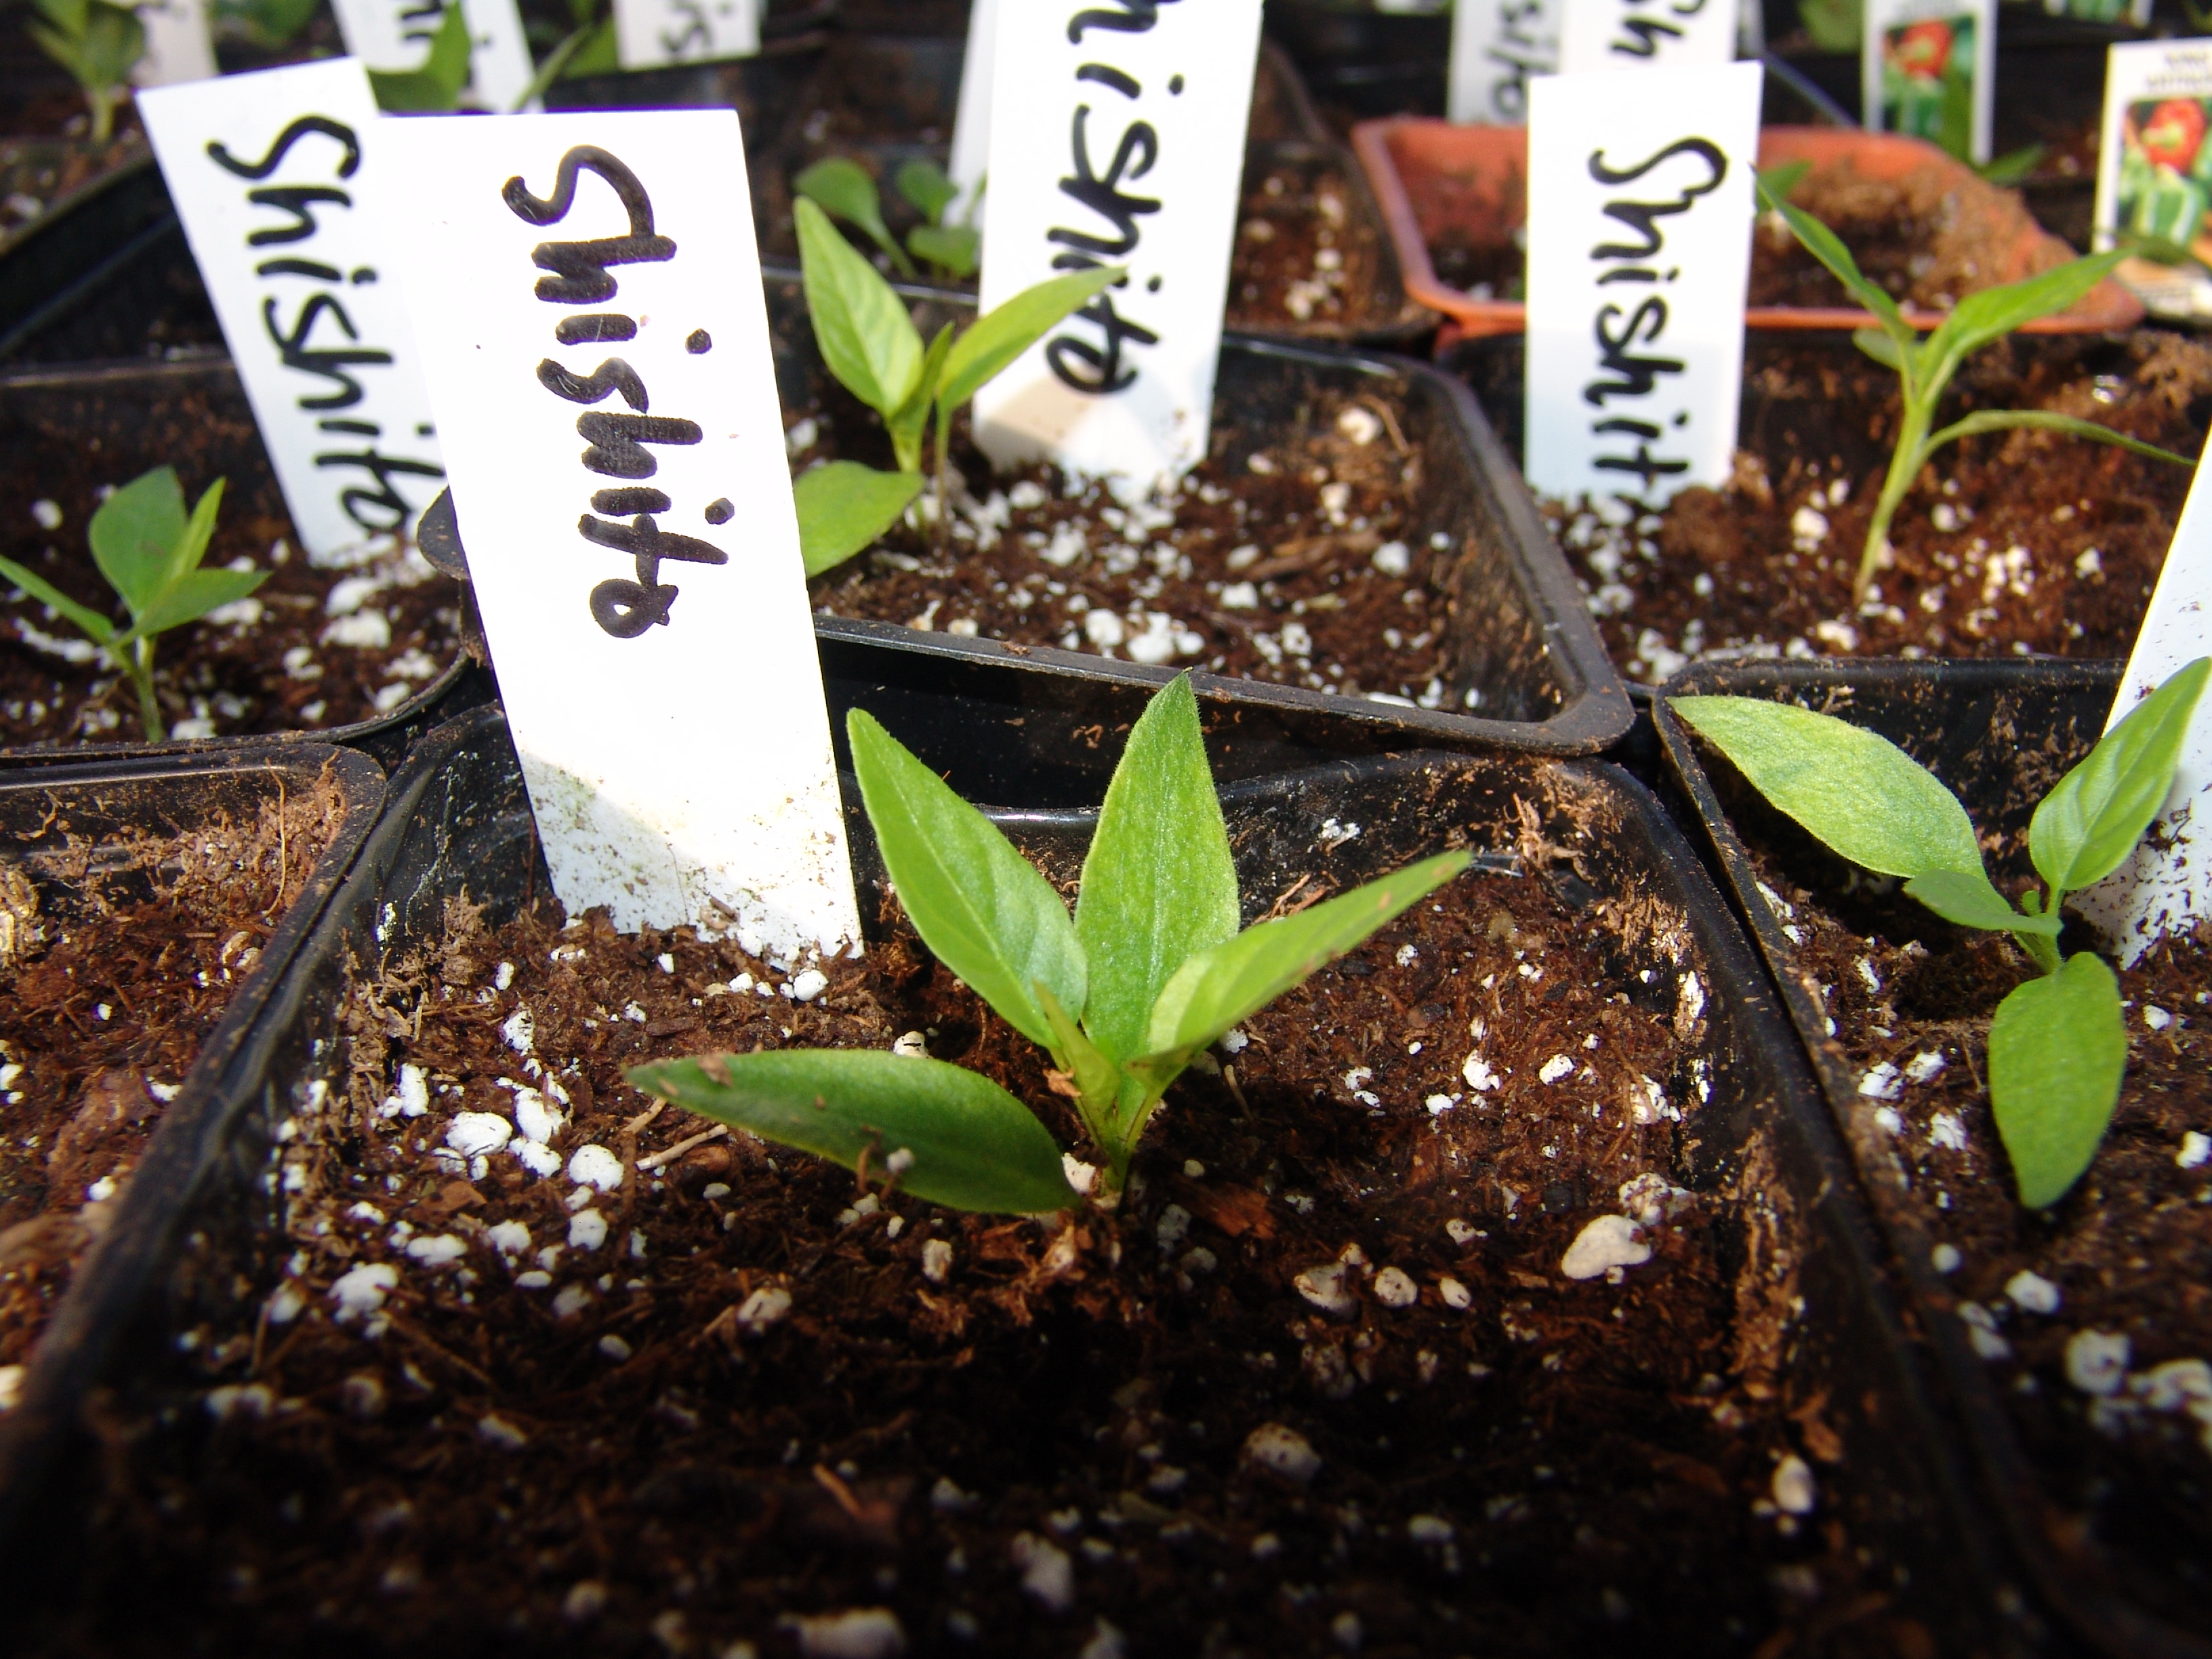
CINNAMON Basil
The basil is giving back already. As I put each of them into larger homes, the myriad of aromas tickled my nose. Especially the cinnamon, one of my favorites. I like to mix it with fresh tomatoes, sweet onion and little bit of garlic and make a light, fresh sauce for pasta.
The count on peppers so far is 1210 pots with maybe an additional 30 pots coming from late “germinators .
This is an excellent article on testing the germination rate of seeds. If you are like me, I am always saving seeds I buy, seeds I collect from my garden, seeds I save from other folk’s plants… Sometimes I feel the need to test the germination rate of seeds I buy from commercial seed houses! Occasionally I get no or little germination on a seed packet.
How to Test the Germination Rate of Your Old Seeds
I love to buy, collect, save, and trade seed, but I have to admit that I do not go about it in a particularly organized fashion. While I am careful about where and how I store my seeds and I do have my own “it’s all in my head” system, it doesn’t exactly compare to some of the personal seed banks I have seen. I do not have Excel charts or lists of any kind that track what I have and when I got it. If I’m being honest, I often don’t realize I am out of a particular something or other unless I bother to check ahead of time. However, most years that moment doesn’t come until I am in the act of sowing. Whoops, guess I won’t be growing that this year. For this reason, it’s not uncommon for me to find packets in my stash that are older than I can remember. Most store-bought seeds have a “packed for” date on them, but I receive a lot of seed in trade, and some of those traders are even less organized than me. The seed of some plants last no more than a year or so. If I find an unmarked, rogue packet of onions or leeks I can be nearly certain that they are junk. Tomatoes seem to last forever, so if I find a packet of unknown origin that I’d like to grow, it’s worth spending the time to test its germination rate.A germination test determines the viability of the seed — how many in a packet will reliably germinate. This is important because the window of opportunity to get some crops sown and growing can be short. I’ve lost the chance to grow a specific variety some years because I sowed and then waited on seed that wouldn’t grow.Germination rate can also provide a gauge of a seed’s vigor. I explain what this is below.
How to Test for Germination Rate
There are lots of ways to go about this. Some people use paper towels. I use coffee filters because I find it easier to see the germinated seeds and their roots should I opt to plant those that have germinated. Fragile roots and leaves tend to disappear in the pile of paper towels.
What You Need:
Coffee filters
Plastic baggies
Water
10 Seeds (per test)
Permanent marker
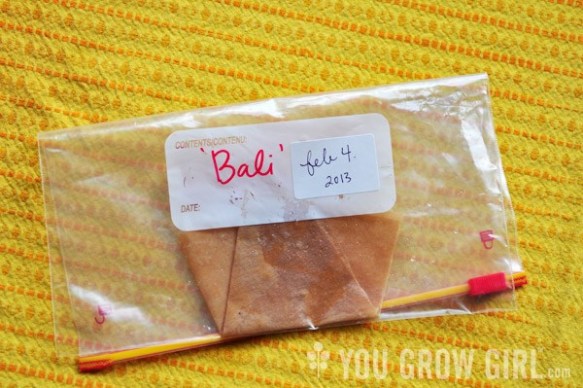
Cut or tear the coffee filter along the bottom and one side seam. Lightly moisten with water so that it is moist, but not sopping wet. I sometimes use a spray bottle but you can also just dip it into a bowl of water and squeeze it out.
Open the filter up flat and lay out 10 seeds on one half. You do not have to do 10 seeds at a time, but it makes figuring out the germination rate a heck of a lot easier. Spread the seeds out so that they aren’t touching. I do this so that there is less chance that their roots will become entangled should I decide to plant them up.
Fold the half of the coffee filter that does not have seeds over onto the side that does.
Fold the bottom half up.
Place the moist and folded coffee filter inside a baggie and seal. Write the variety name and the date you started the test on the outside of the baggie. I write this onto sticker labels so I can reuse the baggies in further testing.
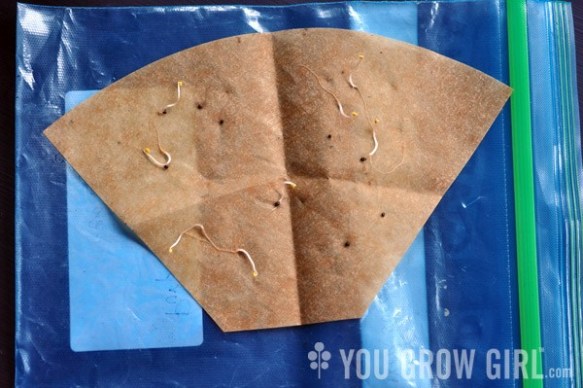
Place the sealed and labelled baggies in a warm place and check on them every few days to see whether germination has occurred. Some seeds may require more time. Some may also require light in order to germinate, or more heat.
Tip: The majority of the seeds I test do well in a kitchen or utility drawer that is used often. Otherwise I have a tendency to forget about them! I also put a sticky note on the front of the drawer as an added reminder to keep checking the seeds! Hot peppers tend to need more heat, so I keep them on top of a reliably warm (but not hot) appliance.
The rate is determined by the number of seeds out of 10 that have germinated. For example, 6 out of 10 seeds = 60% 3 out of 10 = 30% and so on.
You can go ahead and plant any seedling that have germinated into soil just as you would a seed. Don’t bother trying to remove the seedling from the paper — you risk damaging delicate roots. Instead, tear the paper around the plant. (Note: If your seedlings have browned roots like mine do in the above photo then I would not suggest planting them up. I left those too long and the roots were starting to rot.)
Loss of Vigor: Seeds that fall below 70% germination tend to suffer from a loss of vigor that will increase with each passing year. What this means is that even though many of them will still germinate, the seedlings that develop may not be healthy or develop into strong, vital plants. If the percentage isn’t too low you may decide to take a chance and see how the seedlings develop. It should be easy enough to determine which are suffering. However, if you’re planning to save seed from this plant for future crops then you may want to replace the seed now. Unhealthy plants beget unhealthy plants and since you’re going to the effort, it is worth it to start out with the best of the best.
Please note that some varieties suffer from a poor germination rate even when new and healthy, so it’s important to know your plant/variety.
Tip: I keep all of my seed testing equipment (including the used baggies) together with my seed saving equipment in one of the dollar store containers that I use for organizing seed. That way I have it on hand whenever I need it.
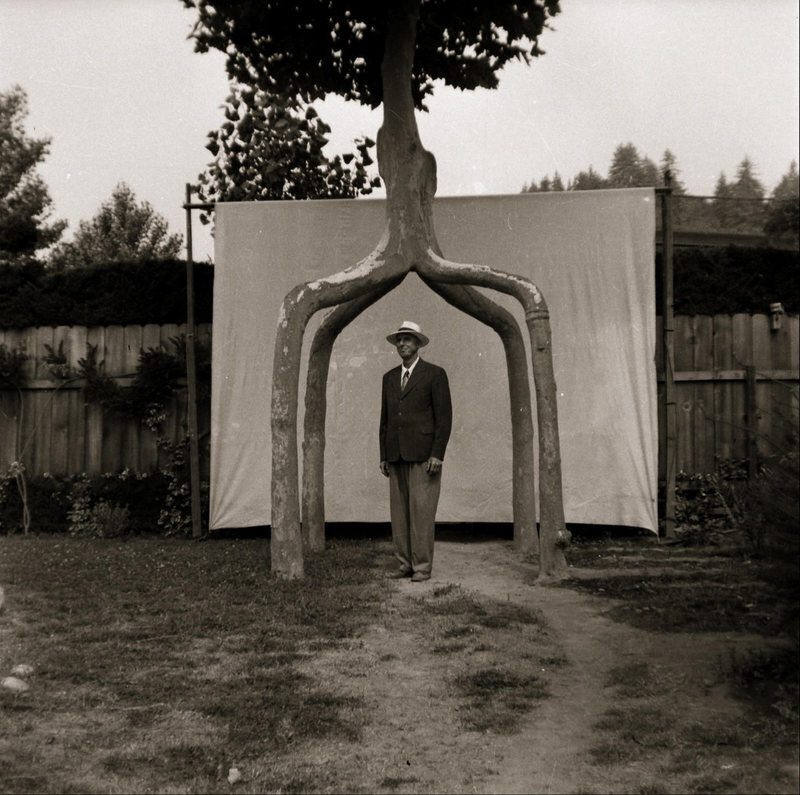
I know this has absolutely nothing to do with tomatoes but this is fascinating…and it has to do with gardening and the natural world right? Enjoy!
What Happened to the First Chair Grown From Living Trees?
On the hunt for a pioneering piece of furniture.
BY SARAH LASKOW FEBRUARY 06, 2018
SOMETIMES IF YOU’RE LUCKY, YOU stumble across corner of the world that immediately captures your imagination. Last summer, when I got into the world of tree shaping—the practice of coaxing trees into sculptures and structures, useful and otherwise—I wanted to know everything I could about it. Eventually, I visited and wrote about a small company in England, Full Grown, that is working to grow an entire forest of chairs, tables, and other furniture. But a small mystery remained, one that I couldn’t let go of: What happened to the original “Chair That Grew,” the first chair coaxed from growing trees?
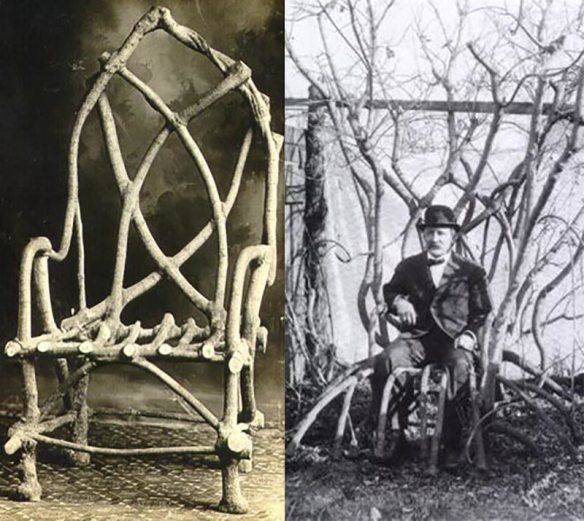
The first person to mention this chair to me was Richard Reames, author of Arborsculpture, who practiced tree shaping for many years.
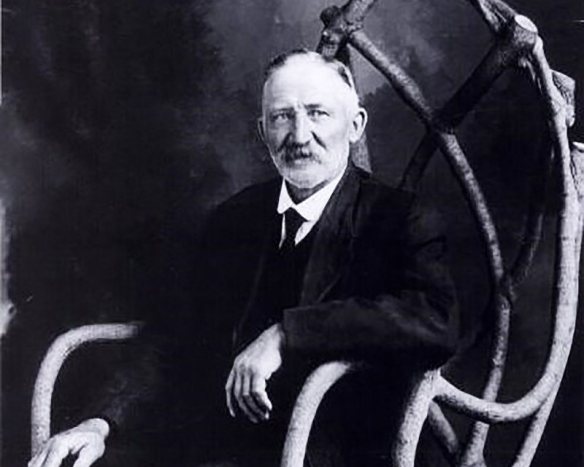
In the first decade of the 20th century, he said, a man named John Krubsack started to grow a chair. It required 32 trees and 11 years, but his quixotic idea worked, and eventually, in 1914, he harvested it.* “That chair went on to the World’s Fair—it was the chair that lived,” Reames said. “He was the first known person to grow a successful chair.”
Later, I came across the chair again: Full Grown’s founder, Gavin Munro, keeps a picture of it in their office. I found an entry on it, too, in Atlas Obscura’s collection of unusual places. But there I learned a troubling fact. The chair seemed to have been lost: “‘The Chair That Grew’ was last seen at the entrance of Noritage Furniture, owned by Krubsack’s descendants, Steve and Dennis Krubsack. The store recently closed, and the fate of the chair is unknown.”
This chair means a great deal to some of the people following Krubsack’s example today, so I decided to find it. I began asking around among the tree shapers I’d met to determine if anyone had been in contact with the Krubsack family. One of them passed along an old email for Steve. Did he still have the chair? Had it been destroyed, misplaced, or sold? I hoped he’d be able to tell me, one way or another. While I waited to see if he would reply to my email, I started to follow the only other lead in this mystery—the town of Embarrass, Wisconsin, where John Krubsack once lived, the chair’s last known location
Krubsack was born in Wisconsin’s Dodge County, but spent most of his life in Waupaca County, where he had a farm in Embarrass. (The town’s name comes from the French verb embarrasser, which can mean “to hinder or slow down”—apparently the river through town is not easy to navigate.) When John Krubsack lived in Embarrass, the population hovered below 300 people. It’s been close to 500, and is around 400 today. The town has a Main Street and a High Street, a couple of bars, a feed store, and a vintage store in a historic church building.
The chair lived for decades in a plexiglass case in Noritage Furniture. When I called the Waupaca chamber of commerce, they said they’d never heard of the chair, in part because Embarrass is on the other end of the county. I should try the Clintonville chamber of commerce, they told me.
Clintonville is an order of magnitude bigger than Embarrass, but still a small place. The woman who picked up the phone there, Jackie, knew exactly what I was asking after: She used to work for Noritage. But she had no idea what happened to the chair. All she knew was that the Krubsack brothers are still alive.
While researching Embarrass, I found another potential clue. After Noritage closed in 2007, a nearby auction company advertised liquidation sales, with real estate, equipment, and furniture available. Had the tree chair gone to auction?
I was about to call the auction company when Steve Krubsack emailed back—a couple weeks after I’d reached out. The chair, he assured me, was still in the family. After Noritage closed, “the Chair That Grew was retained,” he wrote. His brother, in Clintonville, still has it.
He gave me a phone number, and I eagerly called Dennis Krubsack, sensing the end of my month-long quest. I imagined that the chair was kept in a corner of a spacious house, the subject of family lore and legend. I wondered what would happen to it in the long run, whether the family planned to keep it forever or had made any plans for its long-term preservation.But when I got Dennis Krubsack on the phone, I was disappointed: He didn’t want to talk about it. The chair, it seems, had brought him little but bother—unwanted attention from visitors ringing his doorbell or people, like me, calling him on the phone.
I am glad to know the chair is not lost, but I can’t help but feel sad that its heir doesn’t want any attention paid to it. It reminds me of the fate of the incredible trees shaped by Axel Erlandson, a pioneer in the field. After he died, his “Tree Circus” was forgotten, and his trees, left unwatered, started to die. They’re around today only because Mark Primack, whose interest in botanical architecture led him to the surviving trees, saved them.
Erlandson sold the land that held his trees to someone outside his family, which makes their situation different than the chair’s. Many families have heirlooms that pass from generation from generation, but most of those have little interest or value to outsiders. It just so happens that Dennis Krubsack’s is a chair that grew out of the ground. It’s rare that someone across an ocean—Munro, who is growing the orchard of furniture—would keep a picture of one of your family’s heirlooms on his desk.
There’s an argument to be made that the chair should be in a museum, or a collection where it can be made accessible to the public. But it is a strange object, and there’s no guarantee that any museum would see its value, or that people passionate about tree shaping today can ensure its long-term preservation. The Krubsack family has kept the chair safe for more than a century. I hope they continue to keep it safe for decades to come.
*This sentence has been updated to add the year the chair was harvested.
Here you are looking about 1000 or so peppers seeds.
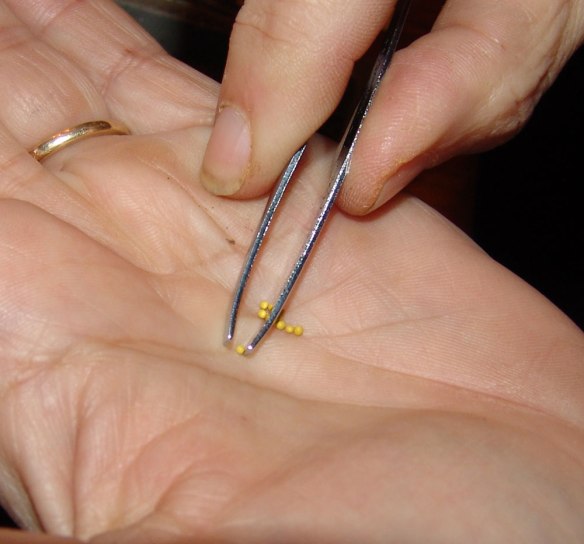
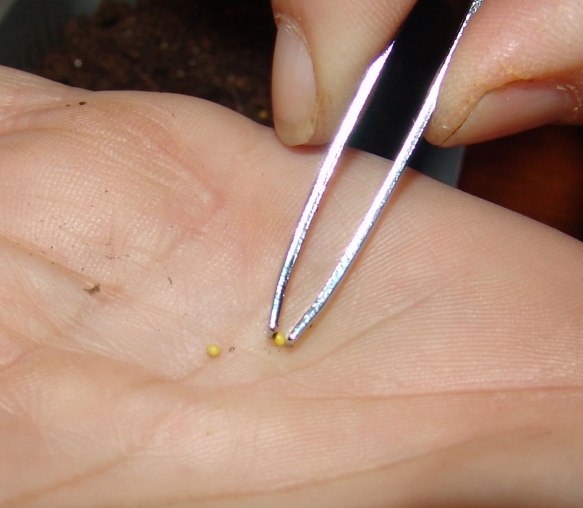
Here I am planting pepper seeds and some flowers. I planted 50 different varieties of peppers, superhots, sweet bell, non sweet bells, hot and medium hot peppers. I was scared to death to touch the seeds from the superhots so I used tweezers to place them in the seedling pots. My luck, I would have touched them and then my eye, not thinking! Ouch! This was on January 15. They have almost all come up now. We have a ton of baby jalapenos. For all of my seeds I use a sterile seed starting mix and clean single pots. Damping off is an ugly thing!
This is how my pelletized petunia seed came. It is put into a gel cap, and looks sort of like Contact cold medicine. Depending on variety, there are 5 to 10 seeds. I love working with it in this form, much easier to not over sow. In it’s “wild” form, it is like brown dust. You might think you used 25 seed but in reality, you just dispensed 349 seeds!
Such tiny little seeds.
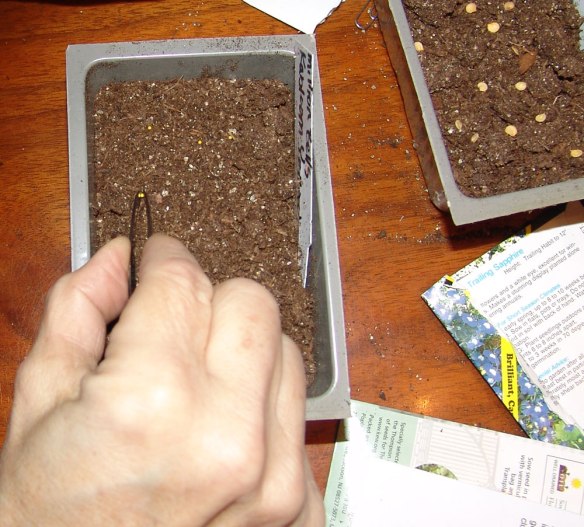
Petunia and Million Bells seeds don’t like to be covered. They need light to germinate. Peppers on the other hand need a thin scattering of seed starting mix over them. Always read your seed packet to see what the light requirements are for germination.
Million Bells is another one that I like to work with pelletized. They are coated with a clay like substance. the seed lays on top (press into the seed starting mix) and wet with water. This softens the clay coat and they are able to germinate. I use tweezers to distribute as evenly as I can so they can grow after germinating and not crowd each other. They take a long time to obtain a size that I like transplanting. I have found there is no point in rushing them.
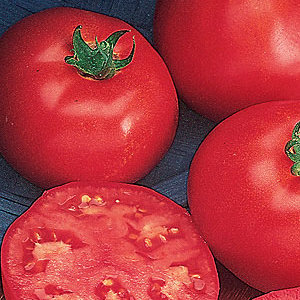
this is a good article that I got in my email. it showcases early tomatoes. I have grown all of these but Novia. I am carrying SubArctic, Legend, and Black Prince. Look for my My Two Cents Worth: I will tell you my thoughts on the variety.
Here’s a tip for early tomatoes. I will try it and let you know how it works. Or you can try it and let me know how it works for you. Flick the blossoms (they are self pollinating) or take a cotton swab/paint brush to pollinate your early tomatoes. Sometimes we don’t have the necessary wind or the bees aren’t out yet so they aren’t being pollinated, therefore no fruit. I don’t know why I never thought of this myself!
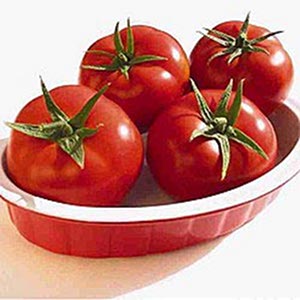
Tomatoes are very adaptive plants, and can produce fruit in a wide variety of climates and regions. Whether you live in zone 4 or in zone 10, you can grow tomatoes without too much trouble.Although this is true it is important to choose varieties that are well-matched for the climate you live in for the best results. Some tomato varieties perform best in very warm climates, while others are bred for better production in cooler climates.If you live in a cool climate (from zone 6 to zone 4) here are five tomato varieties that should thrive for your area.
Northern Exposure
Northern Exposure is a determinate tomato variety that performs very well in cool climates. They are generally ready to pick in about 67 days after transplanting outside which is great for shorter seasons.The compact size of this tomato plant makes them perfect for containers. According to my sources it is now sold on Burpee seed racks as Burpee Early Harvest Hybrid. I honestly don’t know why they change the names! My Two Cents Worth: I have grown this for sale but not put it in my own garden (I only have so much garden space). I have heard from my customers that they love this tomato. It is a very healthy plant in my greenhouse.
Sub Arctic
With a name like Sub Arctic you know this tomato does well in cooler, short climates. It is a determinate variety that produces four ounce tomatoes in about 42 days after transplanting.Ideal for short seasons in the north, or for a quick harvest in southern vegetable gardens. My Two Cents Worth: I love this tomato. Grew it for years but never put it in my garden until I had a leftover plant. I put it into an enormous container and loved, loved, loved it. They are a smaller tomato, about the size of a ping pong ball, sometimes larger and very sweet and bright red. I am offering this one this year.
Legend
The Legend tomato is another variety that produces well in cool climates and is resistant to late blight.It produces large fruit that can measure four to five inches in diameter and are a bright, glossy red color. This is one of the earliest maturing slicing tomatoes available. My Two Cents Worth: This is a lovely tomato, good flavor, consistent size, shape and color. Plus, it doesn’t want to take over the world. In my garden the fruit didn’t get to 5″ across but about the size of baseballs. I am offering this one this year.
Novia
The Novia tomato variety is an indeterminate that produces seven to nine ounce fruit and is very disease resistant.They contain a high level of lycopene which is a beneficial antioxidant. These tomatoes perform well in cooler climates, but can also be grown as far south as zone 9.
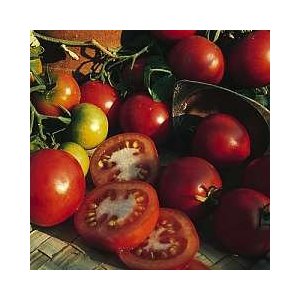
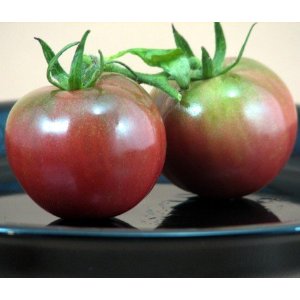
Black Prince
The Black Prince tomato variety comes from Siberia, so you know it is used to some cold weather and short seasons.This heirloom tomato features medium-sized fruit that are a deep red with green to purplish shoulders. They are loved for their rich, almost smoky tomato flavor and excellent hardiness in cold temperatures. My Two Cents Worth: This is very pretty tomato. One of those that are considered “black” Mine were a dark, dusky puprle with green shoulders and about the size of large eggs. The inside is a beautiful dark red and the taste is good but I honestly don”t get the “smokey” flavor. I think that is a trick of the mind! I am offering this one this year.


 CINNAMON Basil


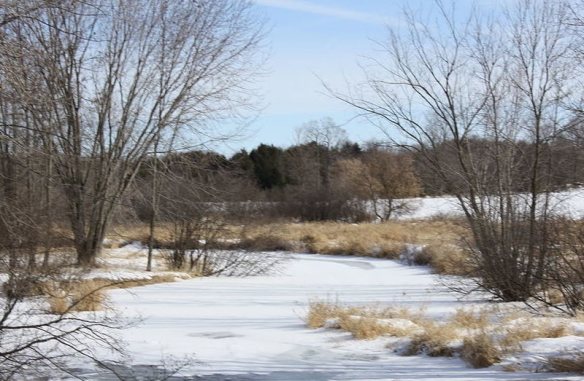 The Embarrass River.